It is not only a fully functional graph visualization library, but also an explorer of data relationships.
!!!###!!!title=Custom character——VisActor/VStory tutorial documents!!!###!!!!!!###!!!description=In the previous chapters, we introduced the basic concepts of DSL and then explained how to use VStory to arrange a story. However, in actual development, we may need to customize some Characters, such as customizing a special component and then using it in DSL. In this chapter, we will introduce how to customize a Character with a real example.!!!###!!!
Custom Character
In the previous chapters, we introduced the basic concepts of DSL and then explained how to use VStory to arrange a story. However, in actual development, we may need to customize some Characters, such as customizing a special component and then using it in DSL. In this chapter, we will introduce how to customize a Character with a real example.
Introduction
We provide the @visactor/vstory-external package to facilitate users in developing custom Characters. Some extended features can be implemented in this package. Below, we will demonstrate how to extend the package by integrating Lottie.
Customizing a Lottie Character
If you need to display a Lottie animation in your work, but the main VStory package does not provide such a Character, you will need to extend it in the @visactor/vstory-external package.
Implementing a Component based on VRender
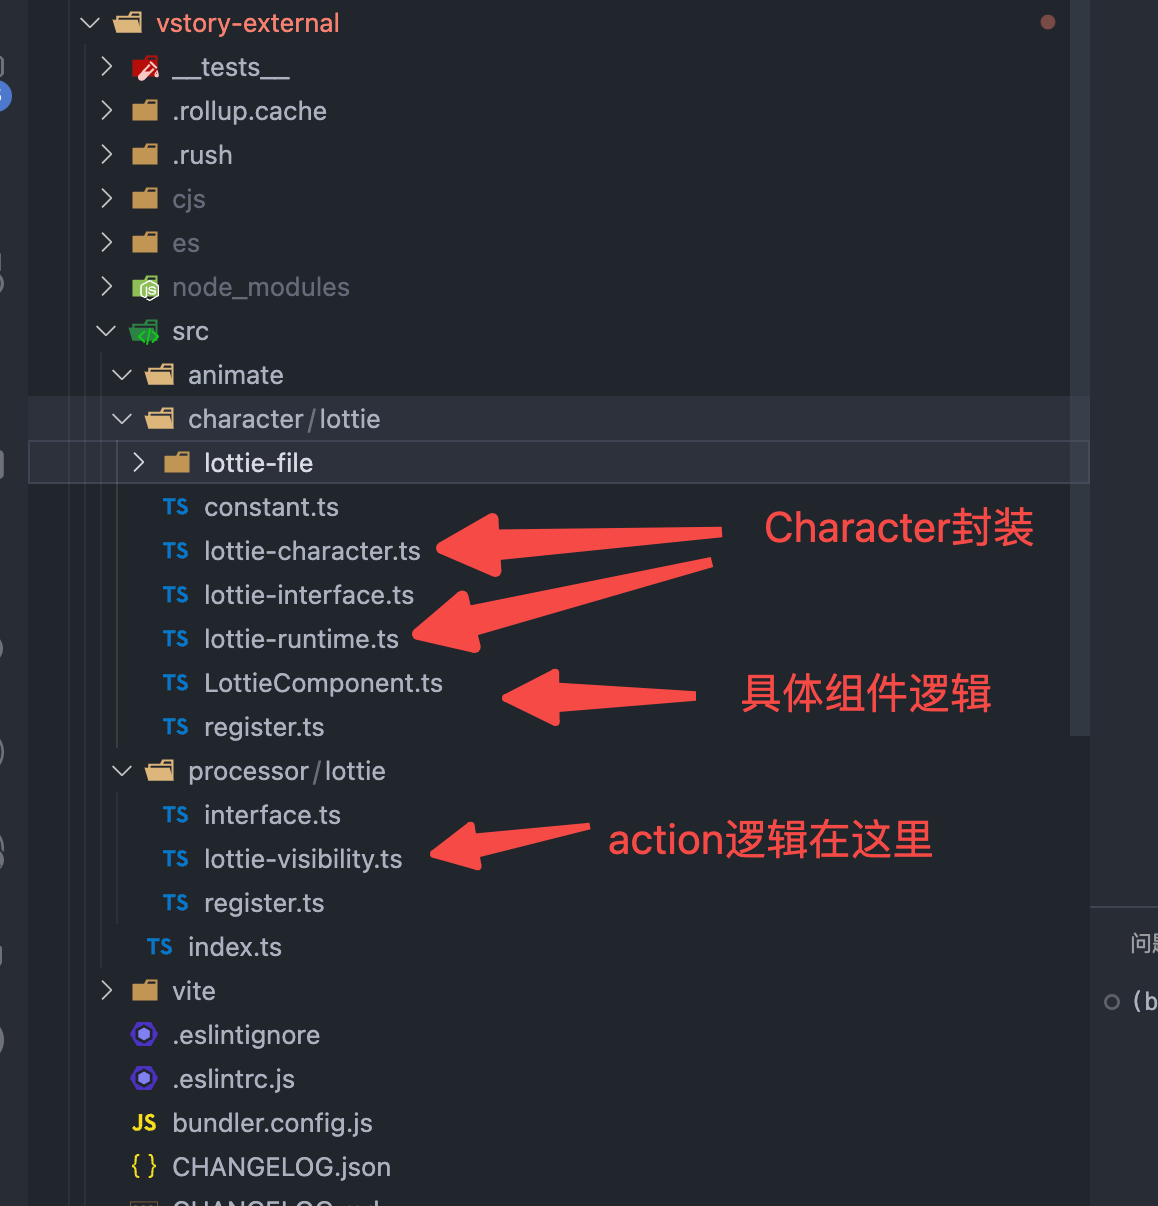
Since VStory is based on VRender, we need to implement the corresponding functionality with VRender first, and then integrate it into VStory as a Character. Fortunately, the @visactor/vrender-kits package already provides a Lottie element that we can directly use.
We found the Lottie element in the @visactor/vrender-kits package, and to use it in VStory, we need to encapsulate it. The purpose of encapsulation is twofold:
Provide some default attributes
Provide parameter conversion, as the parameters in VStory are different from those in the VRender Lottie element. For example, layout parameters need to be converted to corresponding x, y, width, height, etc. parameters.
Obtain some special abilities of VStory, such as all components in VStory carry a text configuration.
Once we have a Lottie component, we can encapsulate a Character. Subsequently, the character configuration in DSL will be instantiated as the Character instance we have encapsulated, and in the Character, we will use the above Lottie component.
After encapsulation, we need to define a Runtime for Lottie. Runtime is the content that a Character executes at runtime, with some lifecycles, such as when options of the Character are updated, the runtime will execute.
export class LottieRuntime implements IComponentCharacterRuntime {
  type = 'Lottie';
  applyConfigToAttribute(character: ICharacterComponent): void {
    const rawAttribute = character.getAttribute();

    const { data } = rawAttribute.graphic;
    // Place a default Lottie
    const builtData = builtinLottieMap[data];
    if (builtData) {
      rawAttribute.graphic.data = builtData;
    }
    // TODO Currently VRender has an issue, must configure fill to draw
    rawAttribute.graphic.fill = true;
  }
}

export const LottieRuntimeInstance = new LottieRuntime();
Defining Processor
After defining a Lottie Character, we now need to define specific behaviors, such as appear, disappear, style, etc., to execute entrance, exit, and style changes. The definition of behaviors in the code is in the processor. The processor is responsible for handling the corresponding behaviors defined in DSL. We just need to define an appear and disappear processor for Lottie. Other behaviors will reuse the behaviors of common components.
What we need to do is simple. We just need to play the Lottie animation when appearing. Other behaviors will reuse the behaviors of common components.
function runLottieAnimate(character: ICharacter, effect: string) {
const graphics = getCharacterByEffect(character, effect)as IGraphic[];
graphics.forEach((graphic: any) => _runLottieAnimate(graphic));
}
function_runLottieAnimate(graphic: IGraphic) {
if (graphic && graphic.type !== 'text' && graphic.type !== 'richtext') {
// Play the Lottie animation when appearingif (graphic.lottieInstance) {
graphic.lottieInstance.stop();
graphic.lottieInstance.play();
}
}
}
export class LottieVisibilityActionProcessor extends CommonVisibilityActionProcessor {
name: string = 'appearOrDisAppear';
constructor() {
super();
}
run(character: ICharacter, actionSpec: IActionSpec): void {
super.run(character, actionSpec);
// Execute special behavior for Lottie runLottieAnimate(character, actionSpec.action);
}
}
Registration
Next, we export the registration methods for Character and Processor. You can see the specific code in packages/vstory-external/src/character/lottie and packages/vstory-external/src/processor/lottie.